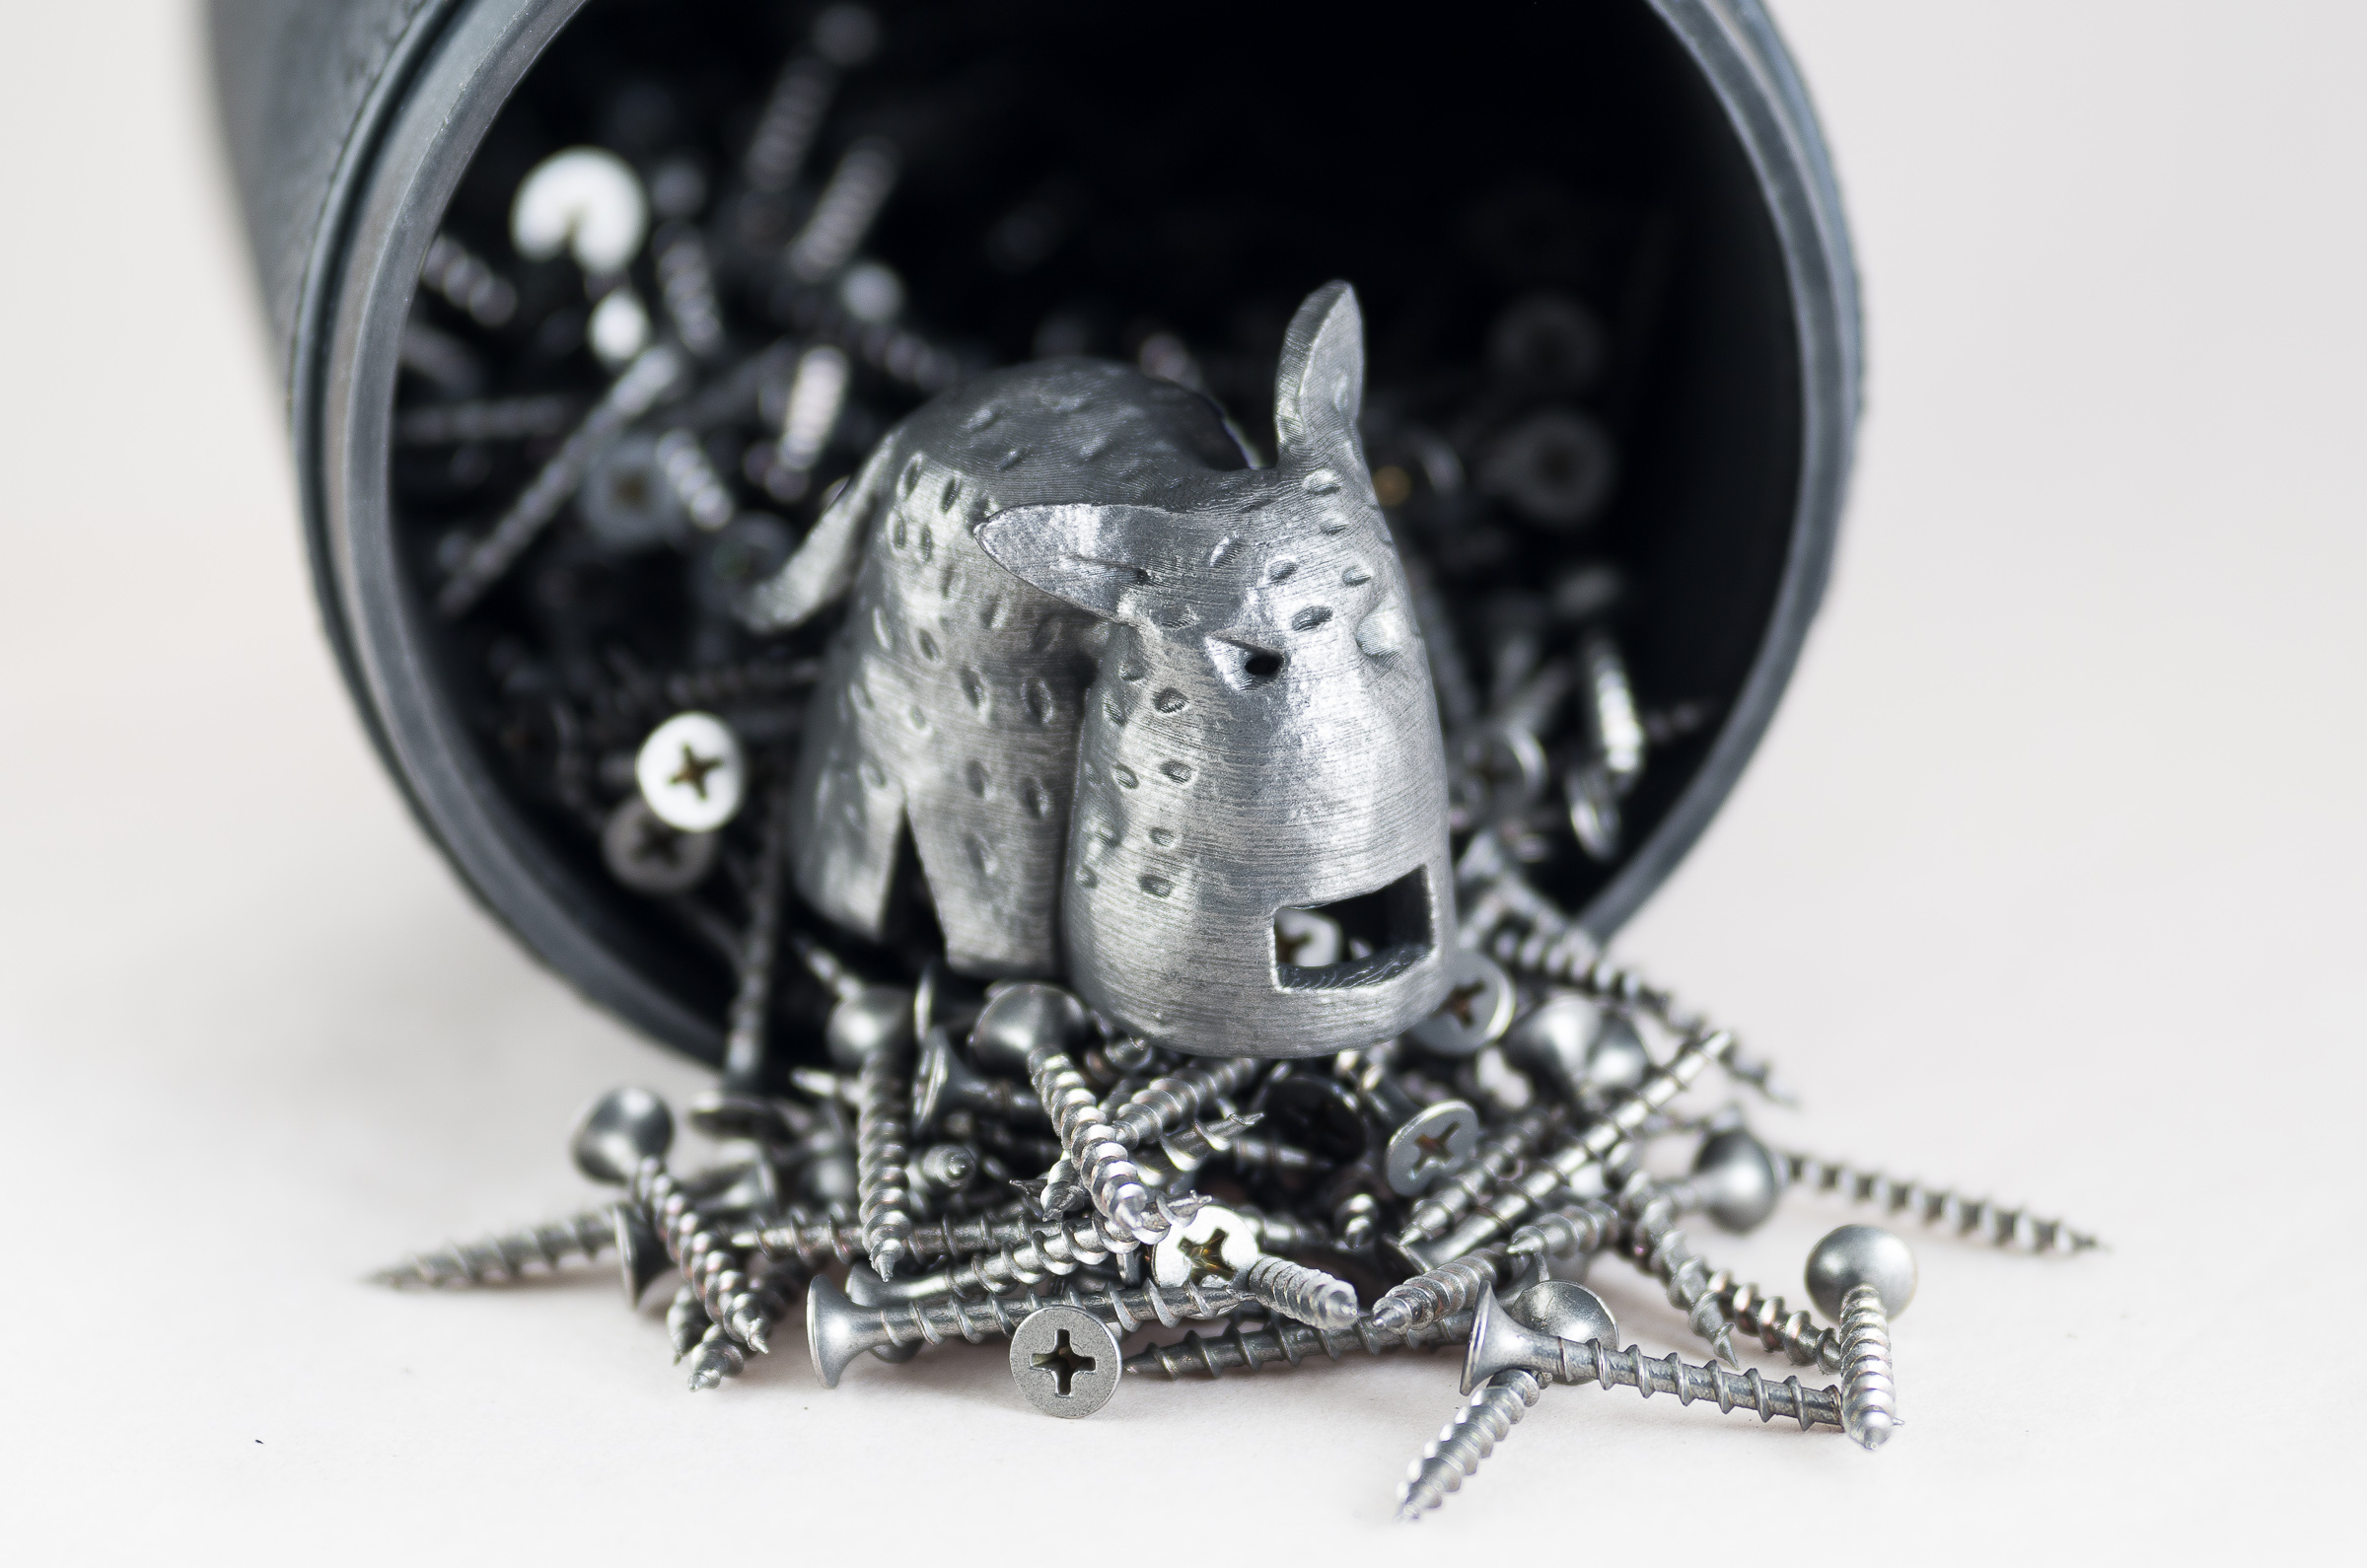
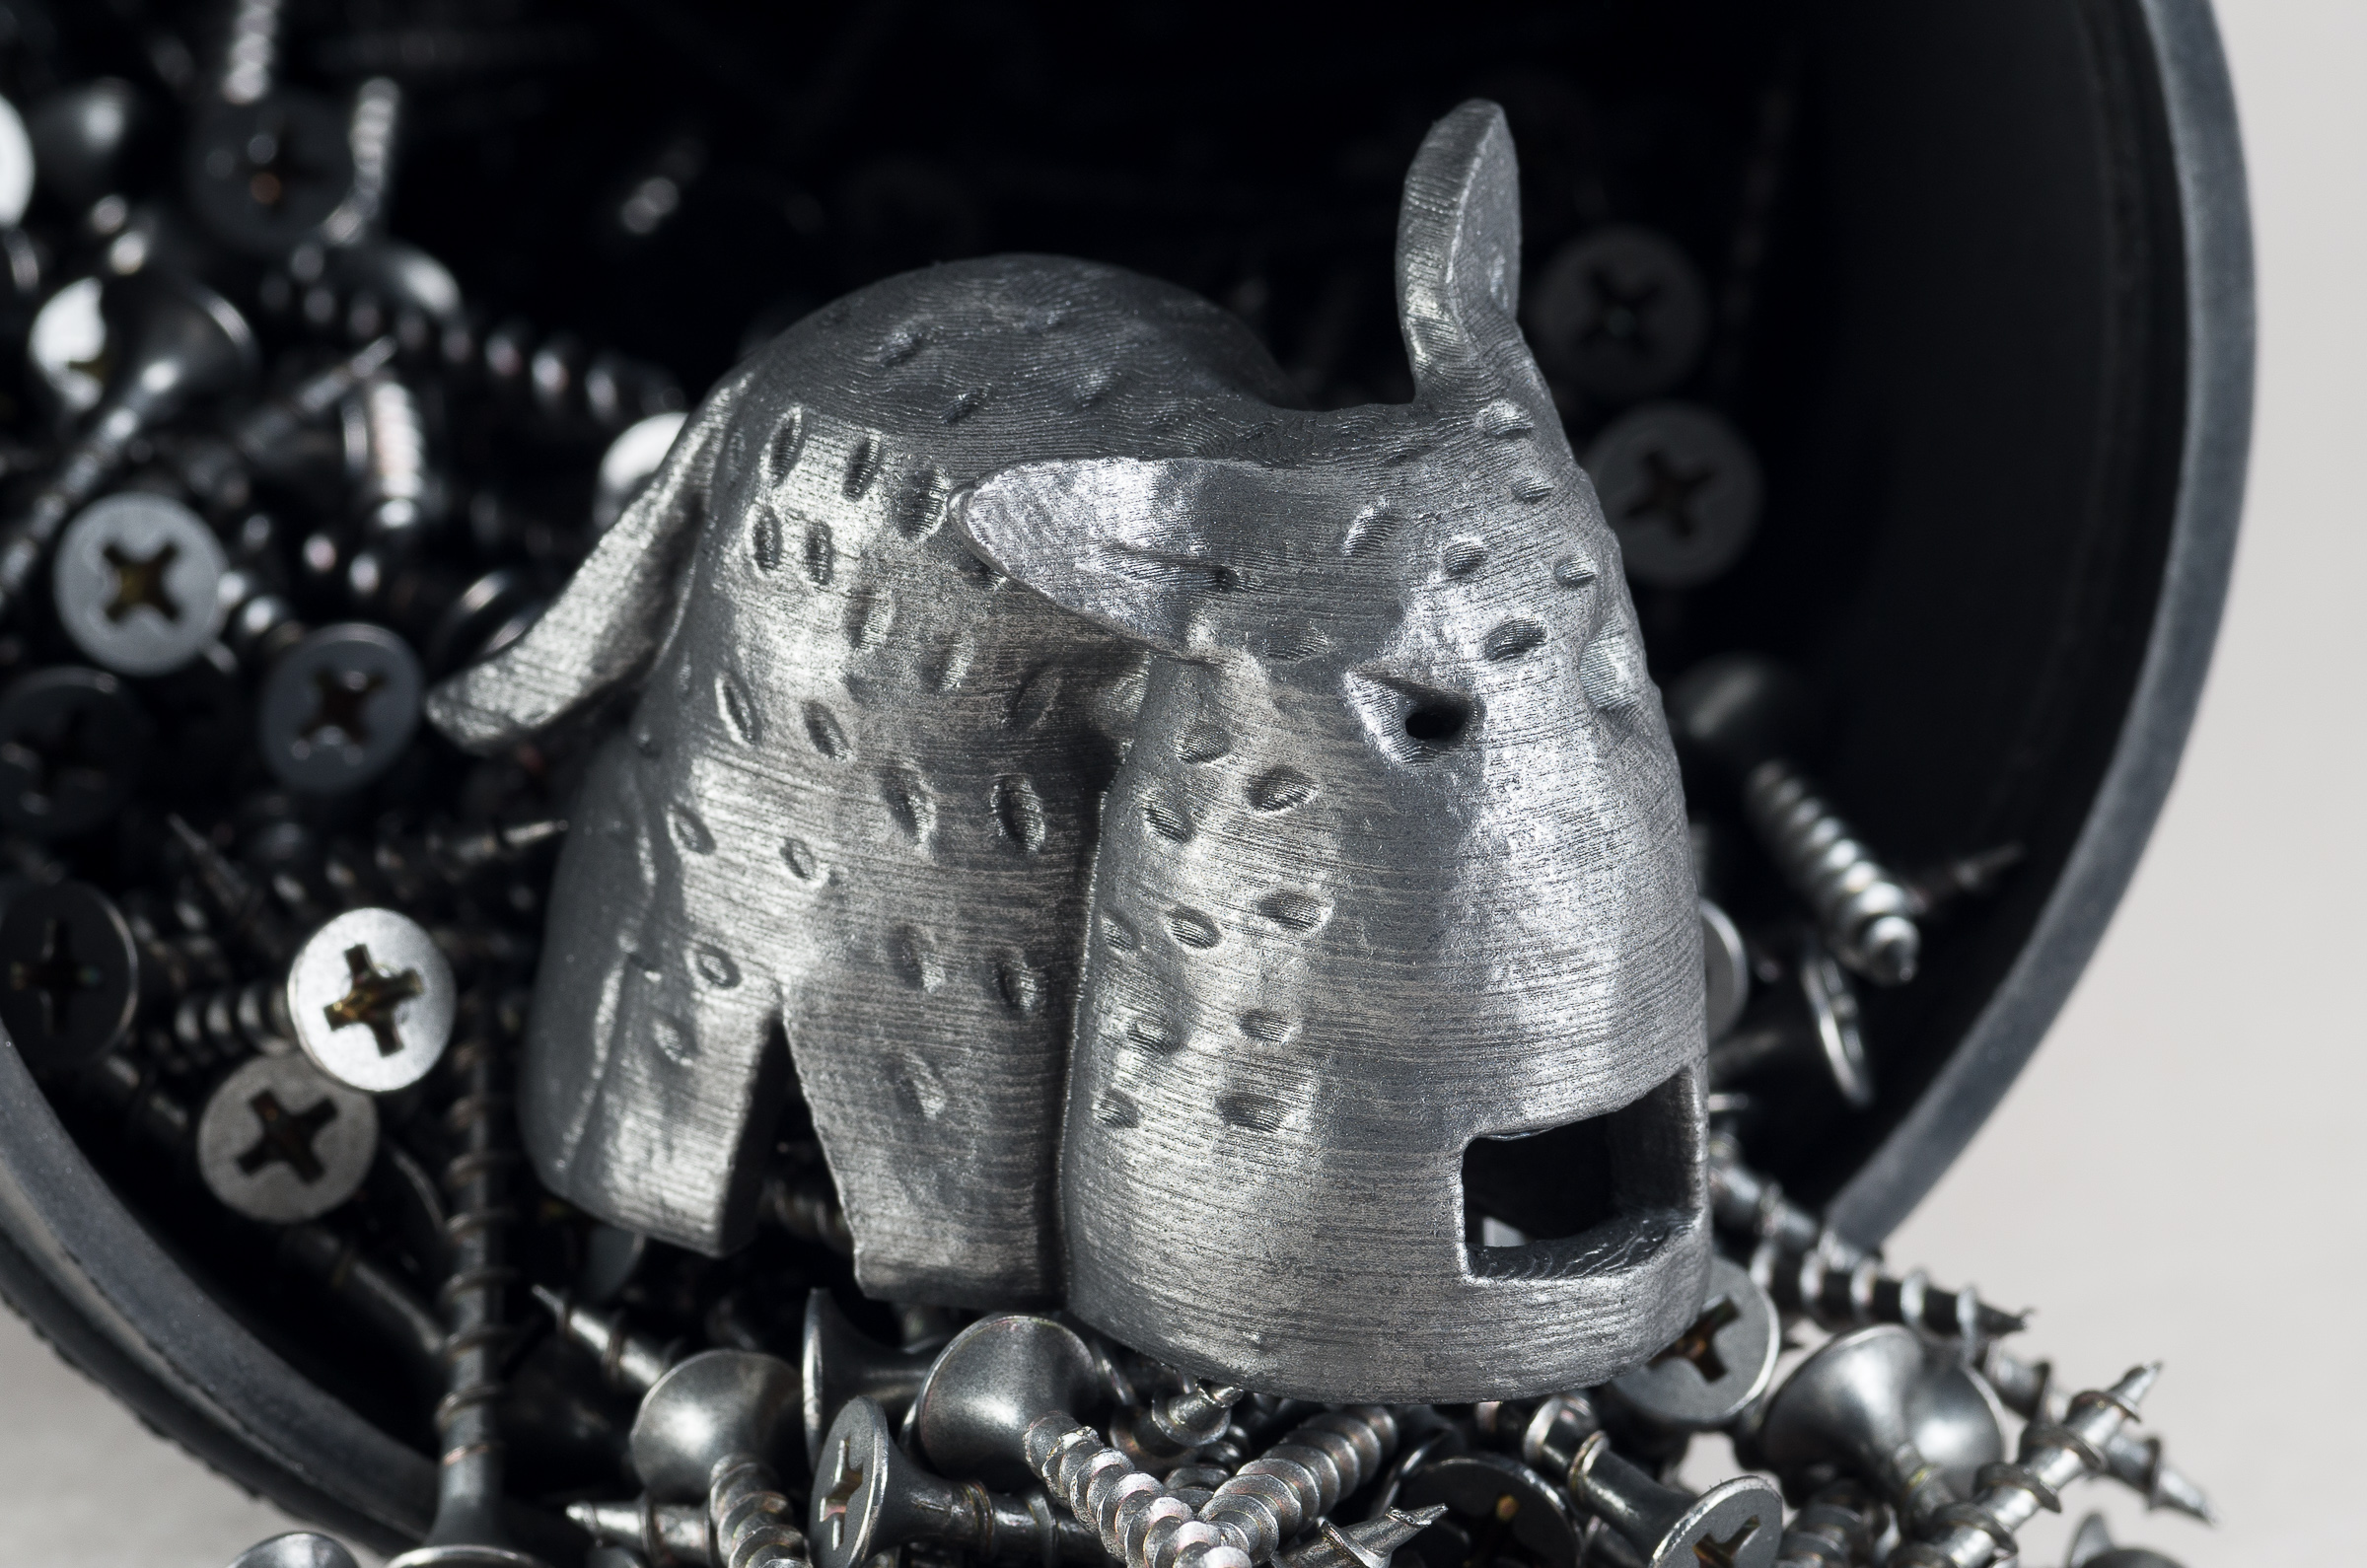
Here’s the process I used to get the results in the picture. I’m sure there are many ways to do this and I’m still trying different variations, but I’ll describe what has worked so far. I’d encourage experimenting, just be careful when working with alloys that contain lead.
What you need:
- 3D printed part
- rock tumbler
- screw tumber media
Printed Part – The coating seems thick enough where I don’t think the color of the print matters much, but if there are interior areas or cracks, the original plastic may show through. I’ve only try white and grey object in ABS and PLA though. I printed with a 0.3mm nozzle, two shells and 50% infill and didn’t have any problems with the parts breaking.
Rock tumbler – I’m using a rock tumbler from Harbor Freight (chosen because it was the cheapest one I could find). The two barrel version will let you keep different tumbler media in each barrel so you can switch without cleaning. Keep in mind that a larger barrel may need more tumbler media and may be harder on the prints.
Screws – I used yellow zinc plated #8 x 1.25 inch deck screws (also chosen because they were the cheapest option at a little over $3 USD per pound). I filled the barrel about half way, approximately 1 pound (1/2 kg) of screws.
Tumble for at least a few hours (no water), preferably overnight. Once the barrel is full of metal powder, future coatings may be faster. I don’t know how much the size or quantity of screws matters, if the zinc plating matters (I wanted to avoid the dark coatings), how long the screws remain effective, etc. I haven’t tried adding additional metal powder, but that might be a more efficient and controlled way to coat the parts.
I’d also recommend reading adafruit’s guide to polishing copperFill and bronzeFill, it’s about polishing instead of plating, but that’s what convinced me to try using a rock tumbler.